3 step workflow RAW processing DxO and Nik Collection
DxO Photolab 2 has to be the best image processor on the market, you might say there are some as good as DxO Photlab 2 but there are none better when it comes to processing your files. I make a distinction between processing, editing and manipulating files.
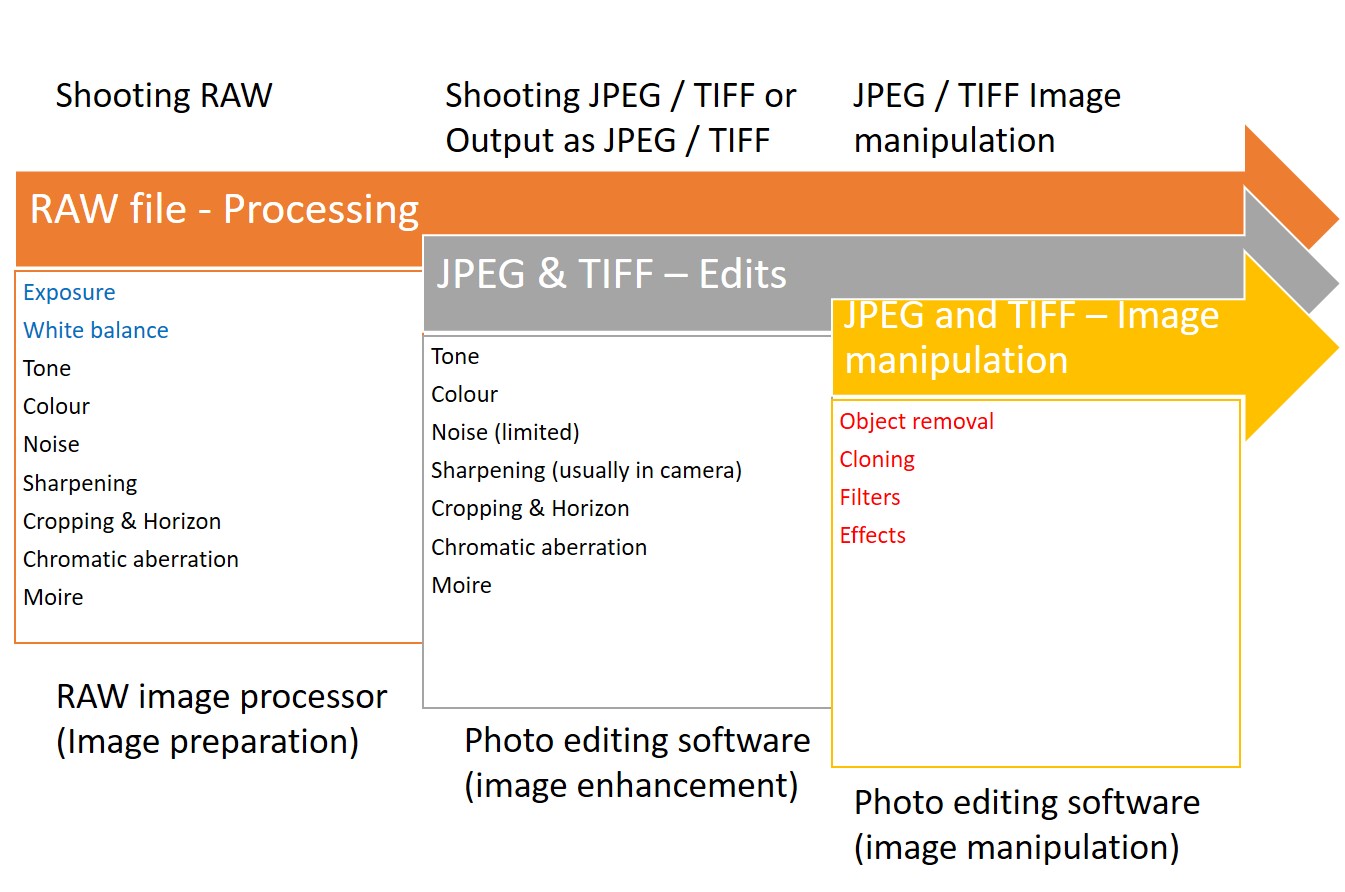
The diagram below helps to explain the differences
My image workflow and tool use like this
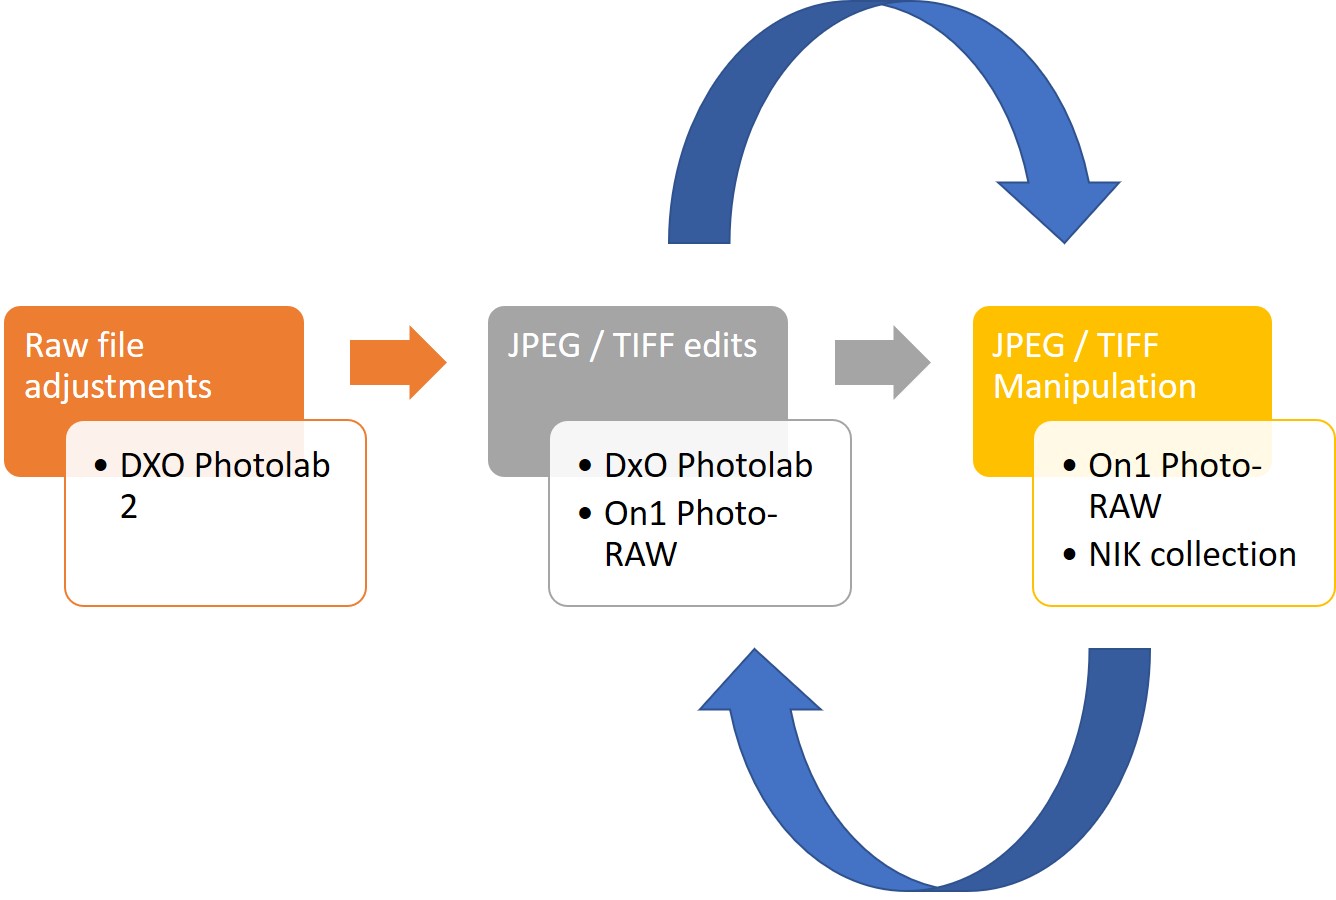
The last two steps above are interchangeable depending on my final image.
This process allows me to take my RAW image, process it and output the file as a JPEG or TIFF for further work as necessary.
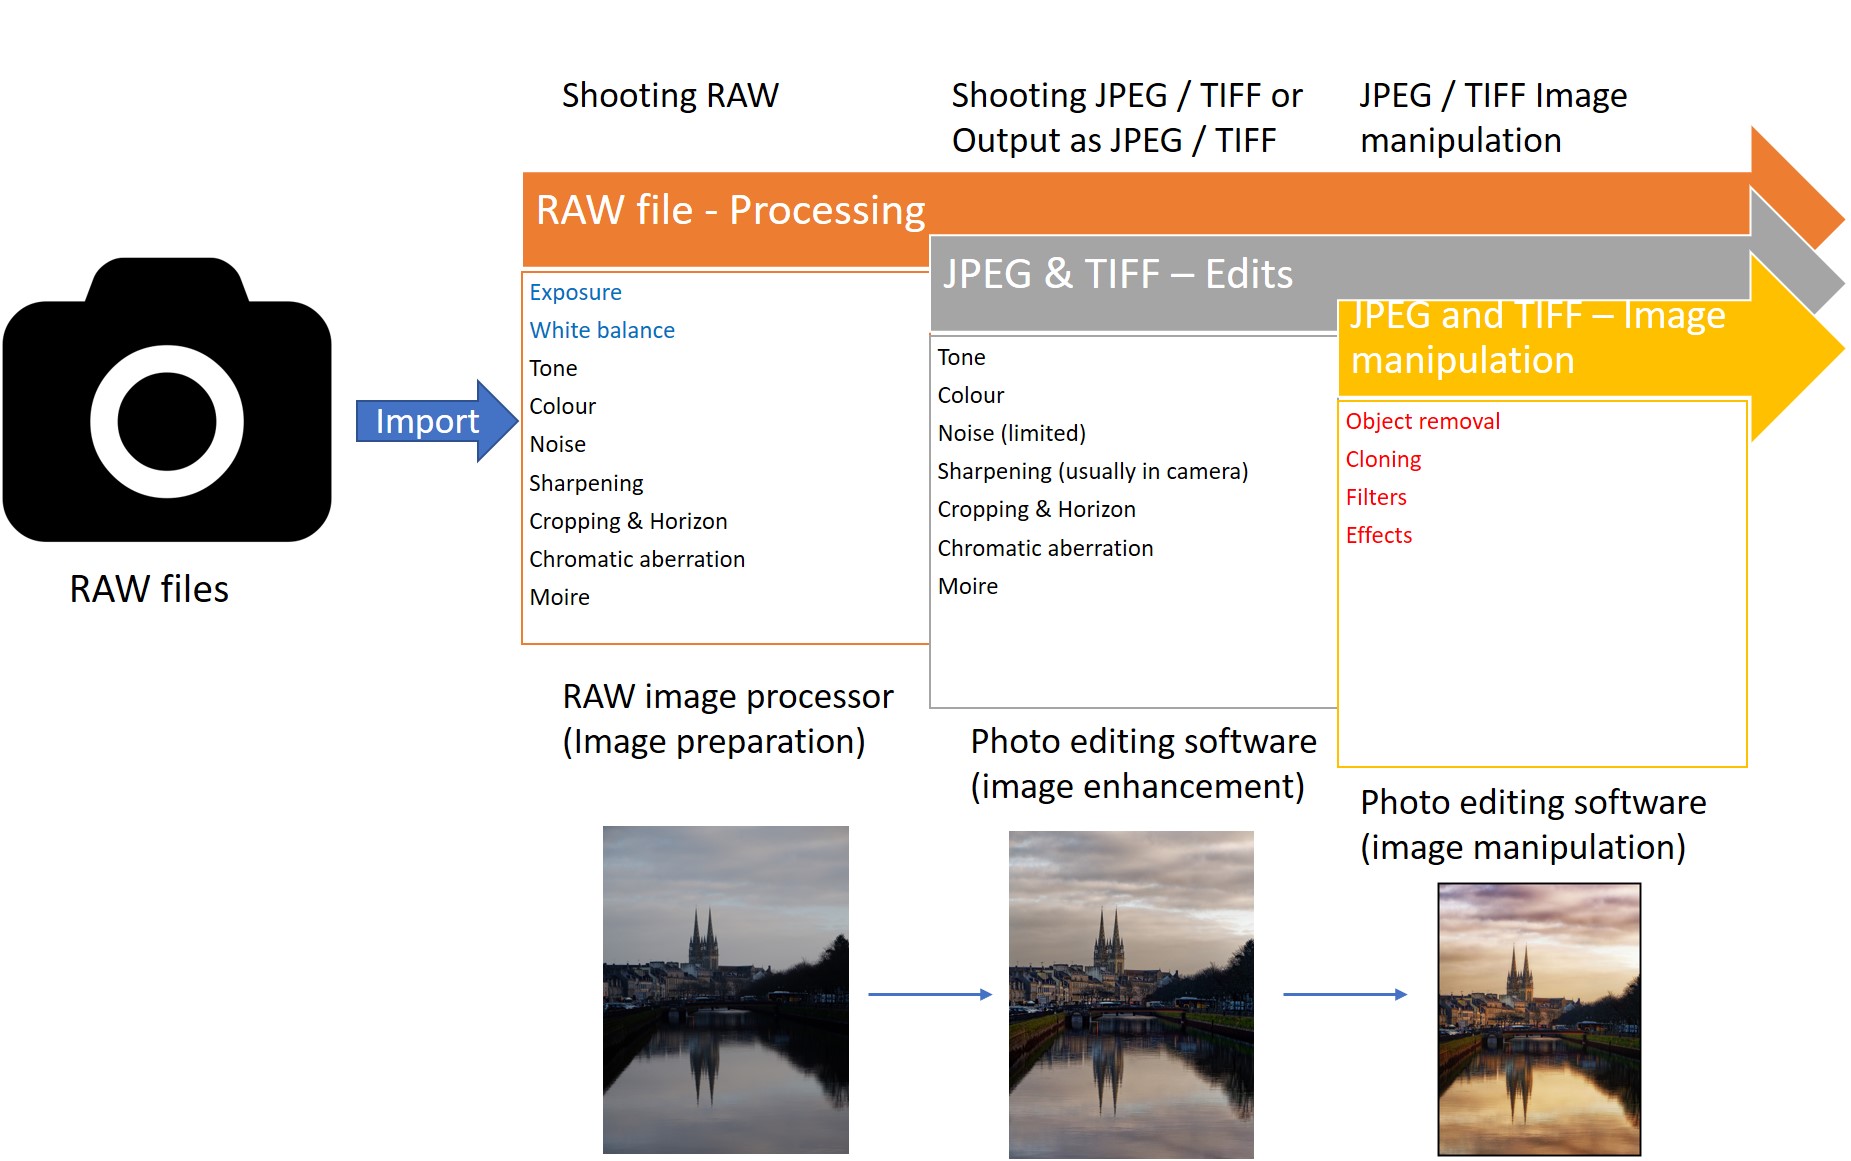
In the example below, I have chosen to work with DxO and Nik Collection.
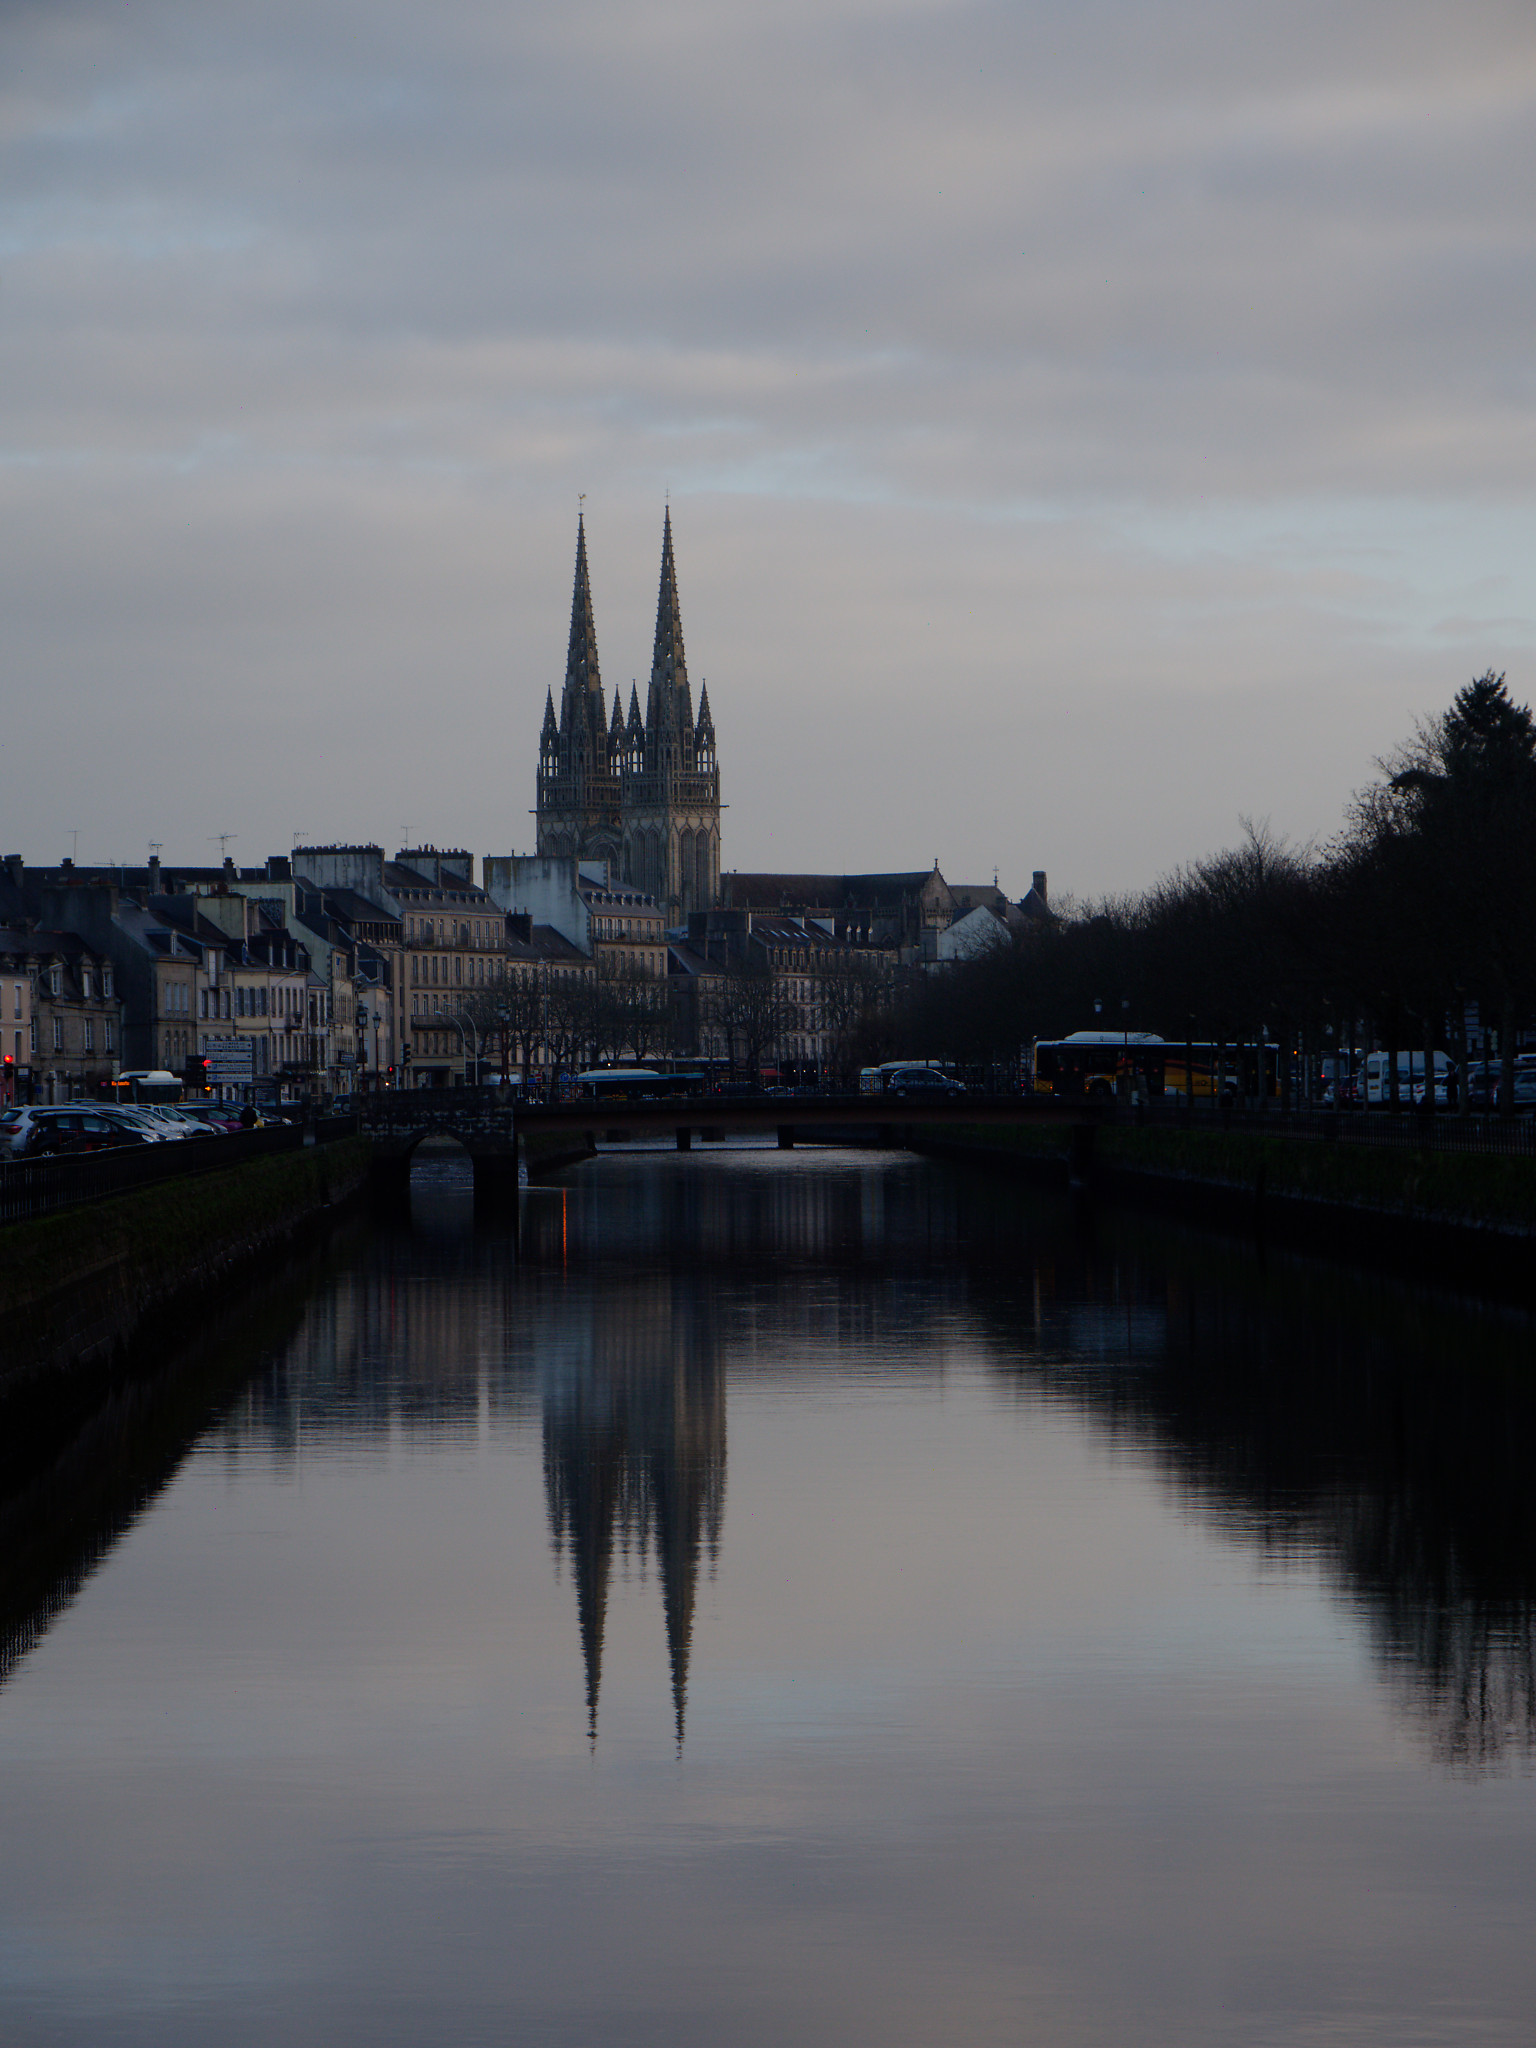
I purposely underexposed the above image to ensure that I did not lose any detail in the highlights. Its a jpeg of a totally unedited RAW file, meaning that I have not applied any corrections or adjustments, it is as shot. Using DxO Photolab I then did my initial corrections.
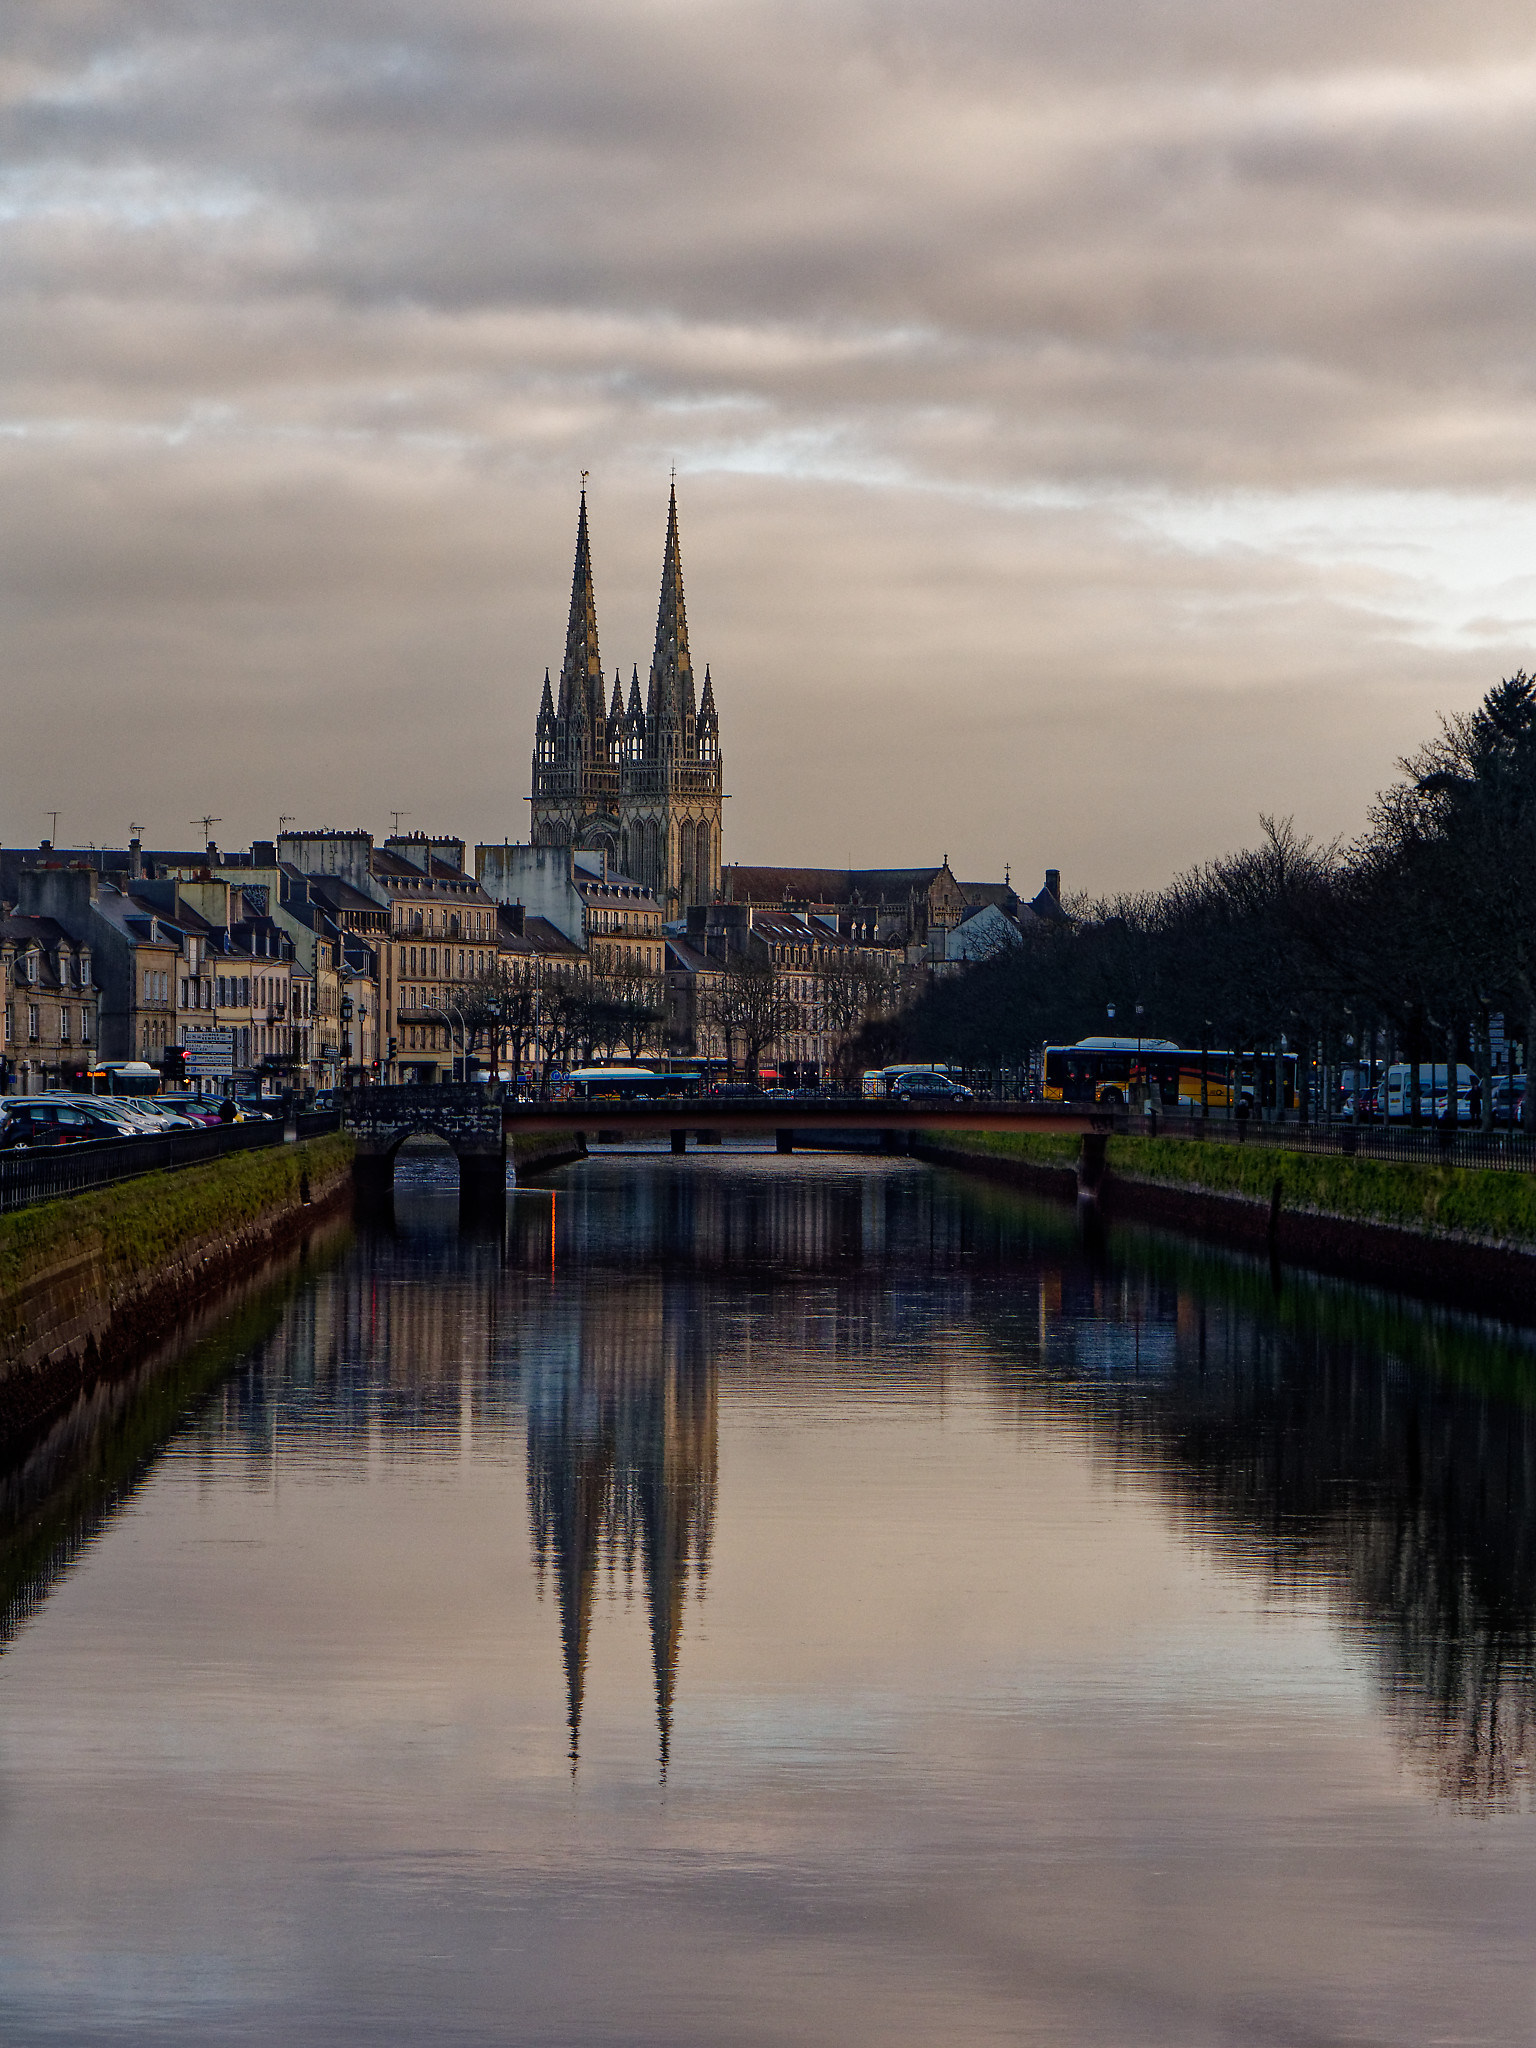
The great thing about DxO is that it applies a number of corrections based on tests of various camera and lens combinations and applies any number of corrections automatically, saving a lot of time in processing RAW images. I let DxO do it’s magic and then applied some local adjustmenst using DxO U-point technology and then output the file as a JPEG for further work in NIK collections.
And finally using NIK Color Efex Pro (the creative bit) I added a combination of filters
- Bi-Color Filter
- Darken/Lighten Center
- Image Borders
- Sunlight
- Monday Morning
Giving me the final image below.
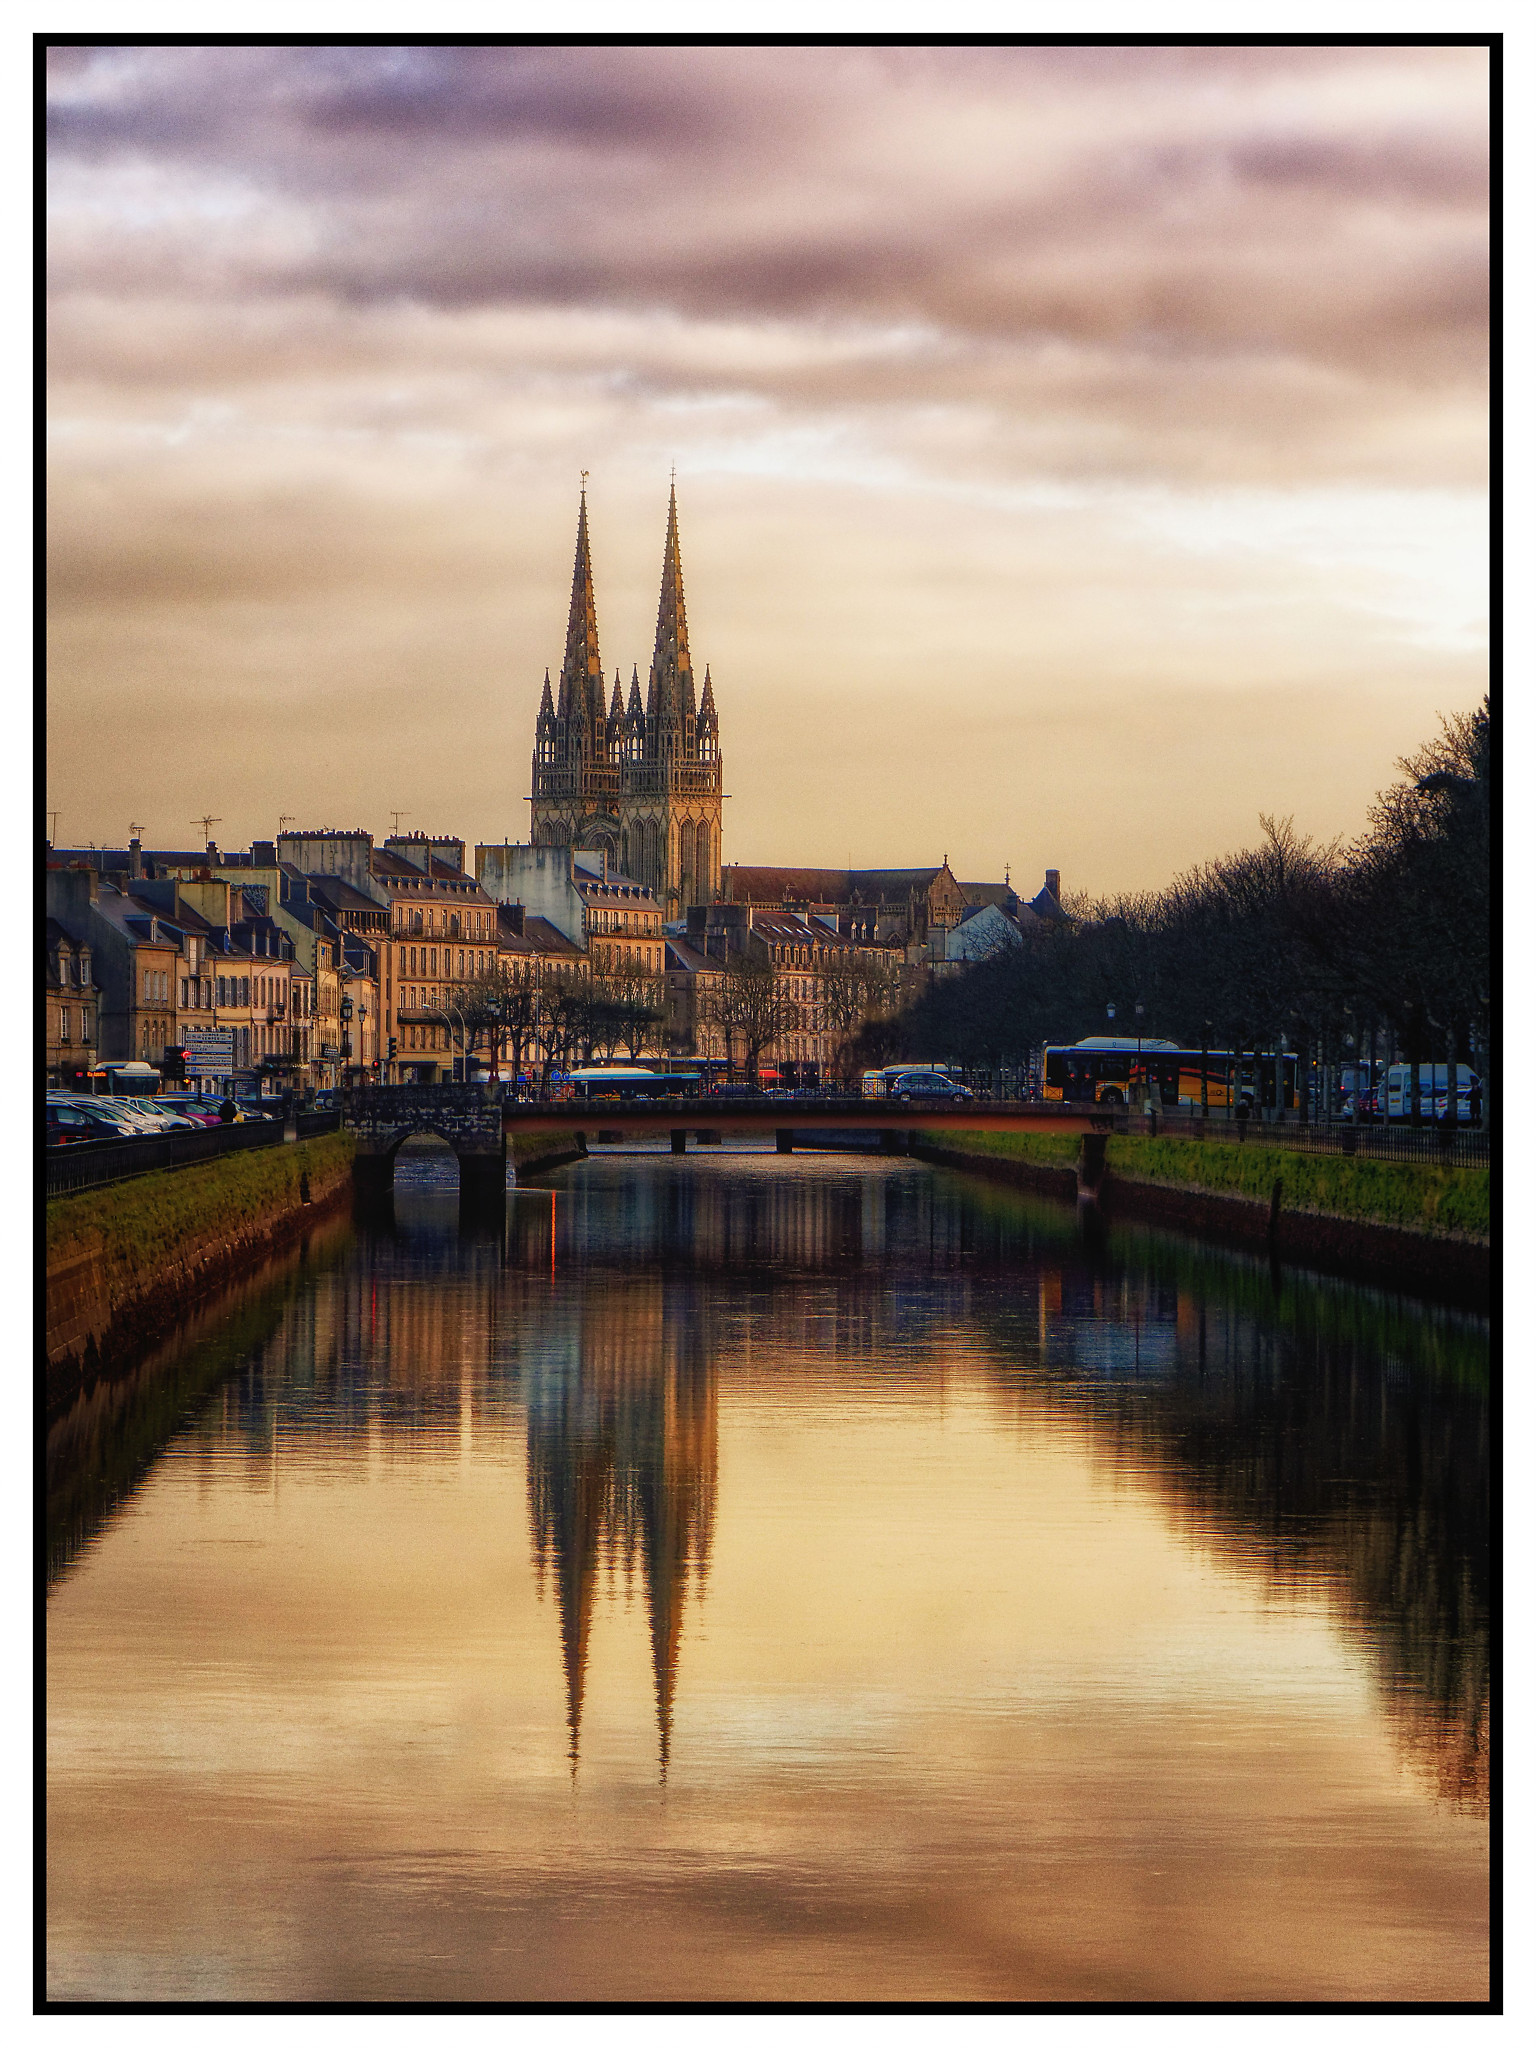
Here is a before and after


I like the end result, although the day was quite overcast there was a little bit of diffused sun peaking from behind the clouds o I set aabout enhancing this image by imging what it might look like with a setting sun.
I actually think that taking photos on a dull day can be very rewarding.
Let me know what you think too.
Start the discussion