In my last post, I talked about the key elements of good photography. In this post I want to talk a little about using your cameras shooting modes.
I am always seeing articles about ‘why you should use you camera in manual mode’ to get the best picture and transform your photography. I do use manual mode, but not all of the time, and here is why. You should use the mode best suited to your needs, the subject matter and your own personal creative style. Modern cameras are very good at handling exposure and giving you a starting point to think about exposure and camera settings.
What do I mean by that, let’s look at couple of examples;
Family day out – If I am out with my family for the day, I might just be interested in recording the days events, in this case, I might trust my camera and leave it in auto mode but just keep an eye on my histogram and other camera exposure warnings. Leaving me to relax and enjoy the day with my family.
Sport photography – Very different from a family day out, here I might be interested in ‘freezing the action’ and I might be working in difficult lighting conditions. My camera does not know that I want to freeze the action! Only I know that and if I leave my camera in auto mode then it may not choose the best overall combination of aperture, shutter-speed or ISO for my needs, resulting in blurred photos. Here I need to intervene, and think about how to use my cameras many functions and in what combination.
In order to use your cameras functions you need to understand a) how they work and b) their limitations.
Shooting in auto is fine, as long as you understand how your camera works and its limitations. Take a look at the picture below.
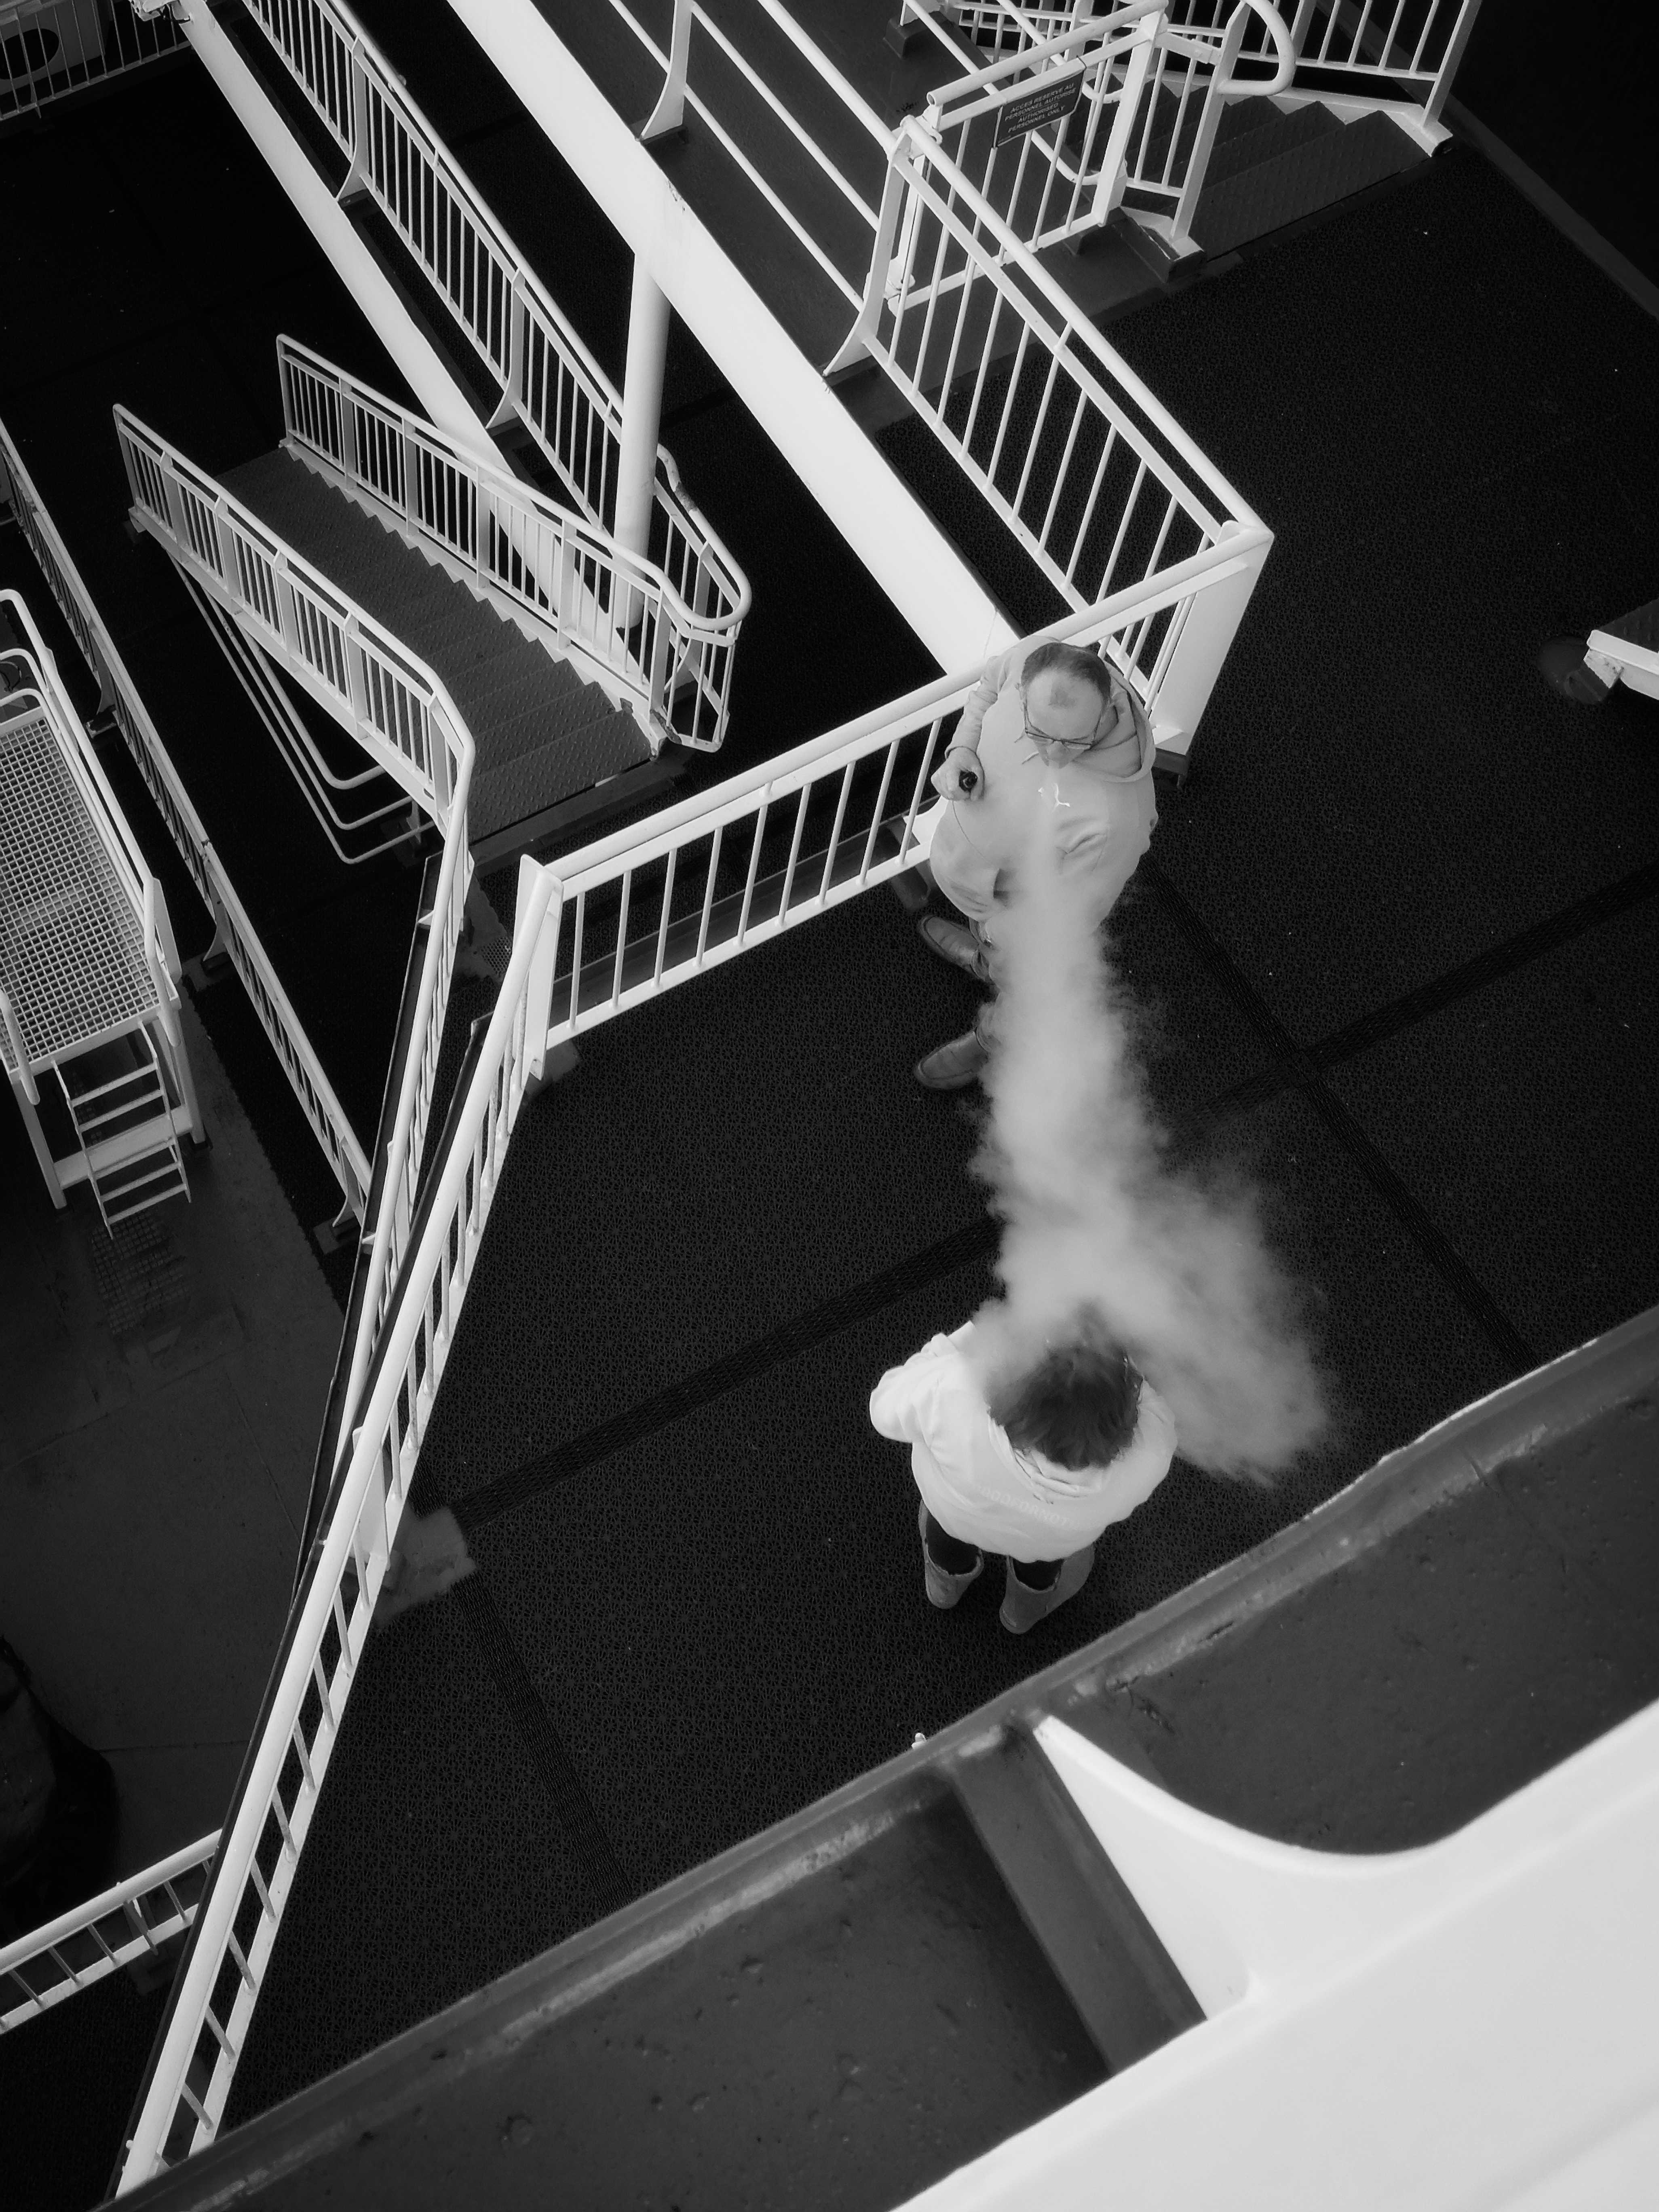
I would never have got this shot if I had been shooting in manual mode, by the time I would have set the aperture, shutter speed, ISO and white balance the shot would have passed.
The trick to using your camera in full auto, semi-auto, or manual mode, is to ask yourself
- What am I photographing?
- Why am I photographing it?
- What do I want the final image to look like?
- And what are the best camera settings to use?
Sometimes there are ‘trade offs’ to be made. For example; if you are hand holding your camera, then you will need to ensure that your shutter speeds are fast enough not to cause blur or camera shake, if your chosen shutter speed and aperture is still causing your image to be under exposed, you will need to increase your ISO, a trade off! A higher ISO may mean more noise and less dynamic range. In this example you may want to use shutter priority mode, or maybe sports mode, where your camera will look to maintain a fast shutter speed by adjusting the aperture and ISO together.

So you can see that there is a need to consider the scene in front of you and the final image you want, white balance, your exposure settings and how to achieve a balance between all of these things.

If that all sounds confusing the table below may help you

Looking at the table, we can see that if we are in aperture priority mode, the camera will set the appropriate shutter speed. Note, we still have the choice to set our ISO and white balance to auto or set them manually
The table helps you see the effects of using each mode.
Dont forget, that you can still bracket exposures and use your cameras compensation dial to effect exposure too.
Start the discussion