Learn to see in black and white
What do all types of subjects have in common? They all reflect light! It does not matter whether you are shooting landscapes, portraits, still-life or any other subject.
Your subject will be made up of a number of reflective tones and your camera’s meter will measure these tones and set the exposure accordingly.
These tones can be thought of as shades of black and white and are called zones.

Each zone represents 1 stop.
- Zone 0 can be thought of as pure black
- Zone 5 is commonly referred to as a midtone.
- Zone 10 is pure white
(I have used this shot of my back garden as it has has a good tonal range for the purpose of this blog).
Most images are a mixture of tones.

When shooting in colour, it is hard to visualise these tones.


And when trying to optimise your exposure you need to consider the contrast range of your subject and the dynamic range of your camera’s sensor.
That means when you are assessing your scene, you need to know
- What are my important highlights?
- Where are my midtones?
- Where are my important shadows?
- What is the overall contrast range of my scene?
Look at the image below

It’s made up of highlights, shadows and midtones.
The contrast range of these scene is within the dynamic range of my camera’s sensor. This means that I will have both detail in my highlight and in my shadow areas.
Anything outside of this contrast range will either be dark or shadow areas with no detail (black) or burnt out highlights or white with no detail. In other words, they will be Under exposed or Over exposed!
My Panasonic GX8 allows me to switch my live view to black and white and I use it to help me assess the contrast range in a scene. You might want to check your camera settings to see if you can do the same. I find that this helps me with composition also.
Let’s stick with the concept of zones for a moment.
Underexposure
When you make adjustments to your exposure you are moving the zones to the left or the right.
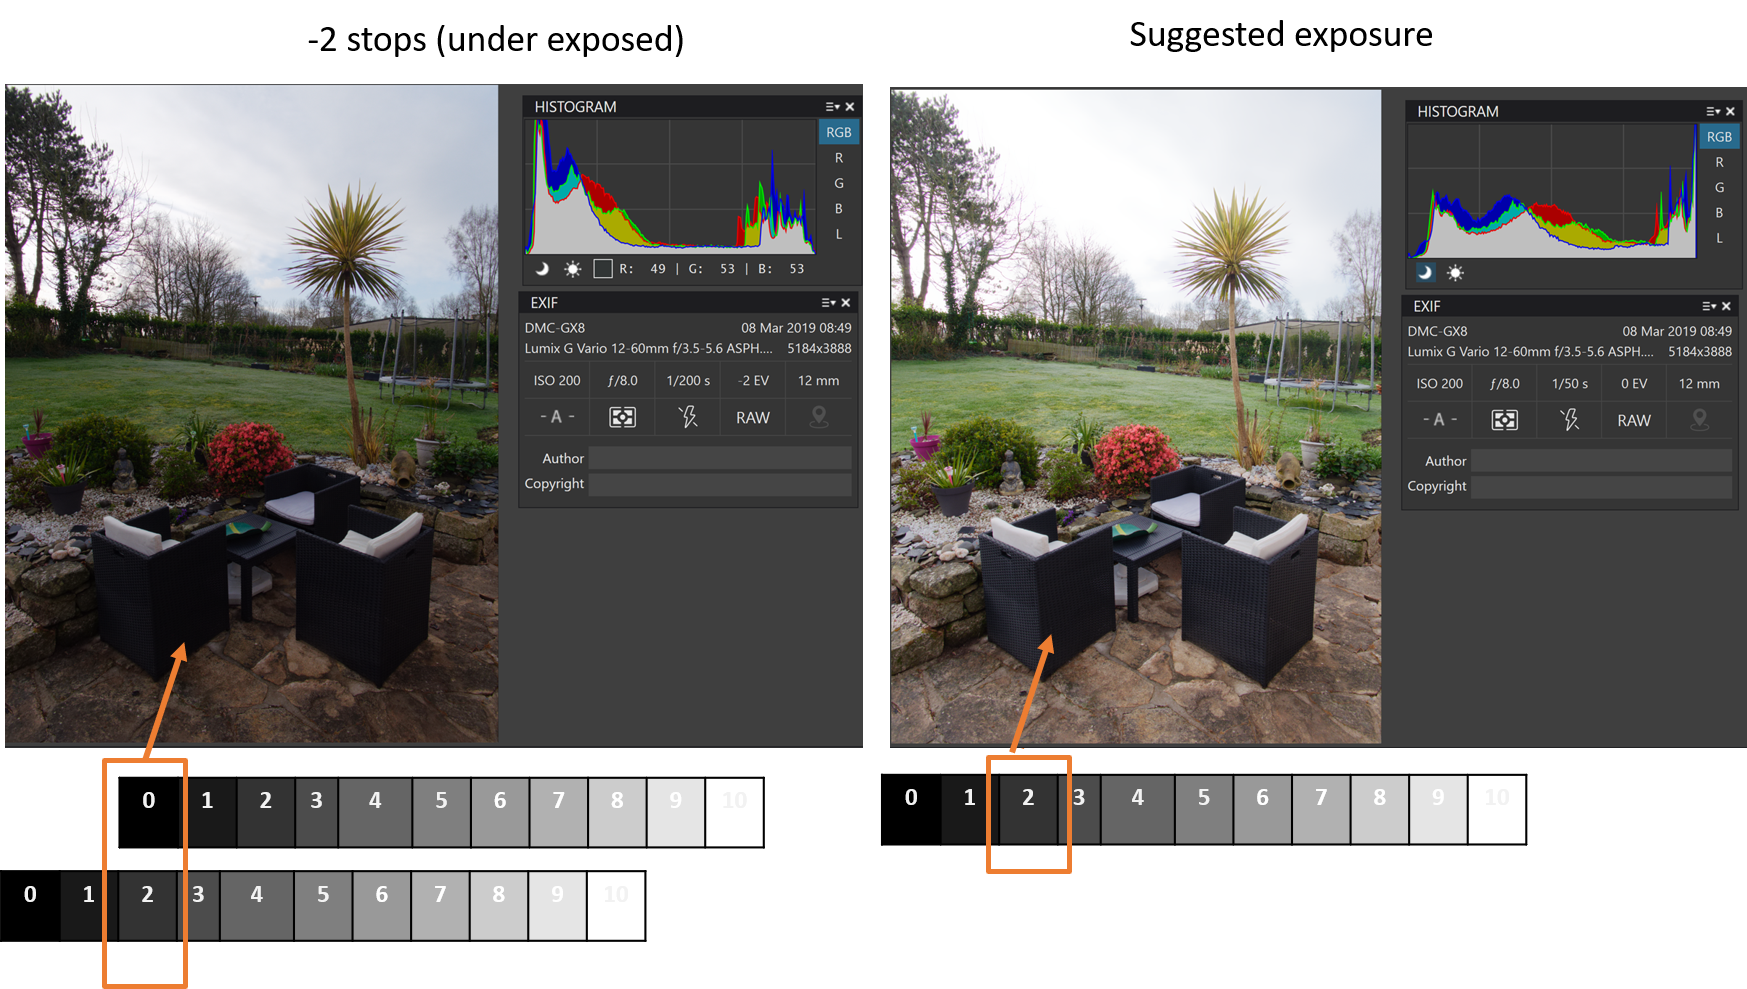 Look what has happened here a two stop underexposure (-2) has pushed all of the tones to the left. Zone 2 has now become Zone 0, which means that there will be no detail in the chair. And look at the sky, it was probably a Zone 9 but is now falls in Zone 7. We have more detail in the sky but have lost detail in the black chair.
Looking at the two histograms above of the same scene you can see that underxposing by two stops has moved the histogram to the right and we no longer have many midtones. The picture on the right has a more balanced exposure, the histogram is more even and the image brighter. Although we may be clipping some highlights.
Overexposure
The opposite happens when we increase our exposure.

The zones get pushed to the left and everyting gets lighter. Our chairs have turned grey when they are really black and the sky is now burnt out with no detail.
Optimising Exposure
An important concept is the notion of midtones. Every type of metering trys to turn your subject into a midtone (zone 5). Without getting into all of the techincal detail basically, most objects in a scene reflect light back at around 18%, half way between black (zone 0) and white (zone 10).
Meters measure how light or dark a subject is and then compensate or bias an exposure towards zone 5. pushing our zones to the left or to the right, zeroing out our exposure!
Practically, if a scene or subject reflects less light or is very dark, the meter will try to brighten the subject. If the scene or subject is very bright or light, the meter will try to darken the subject.

This is how sometimes our meters are fooled into providing an exposure that is perhaps not right for the subject. There is one exception to this and that is when we use an incident light-meter. Incident light-meters measure the light falling on a subject and not the reflective qualities of the subject. These meters are usually hand-held.
The question is; when using your camera’s meter, how can you visualise this, how do you optimise your exposure for the scene you are shooting and do you use evaluative (matrix), centre weighted or spot metering?
Matrix or evaluative metering, sometimes also called multi-zone metering divides the scene into a number of zones and tries to come up with an optimum expsoure. Providing that the proportion of highlight, shadow and midtones are roughly the same and the lighting fairly even and not to contrasty, this type of metering will do a good job.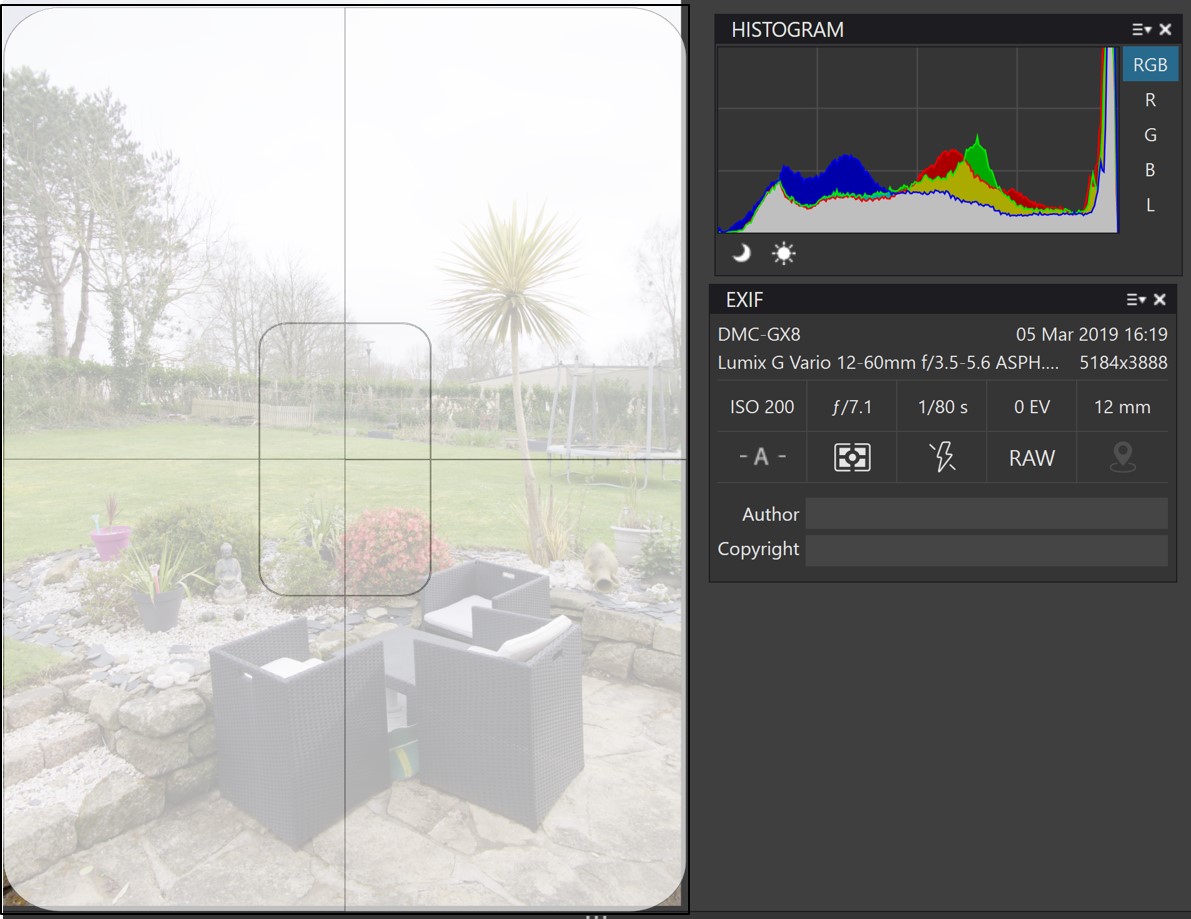
This is the type of metering most people rely on. In this shot though, the top third of the scene is where the main highlights are and the rest of the scene has midtones or darker tones, this has caused the evaluative metering to bias the exposure and brighten the image.

As you can see, the sky has little detail and the histogram shows the bright areas of the sky pushed to the right side of the histogram.
Look at the same shot again using manual exposure settings and spot metering.

This exposure is more balanced. I have used two spot meter readings and averaged them out to pin my highlight and shadow details to the zones I want them to fall in.
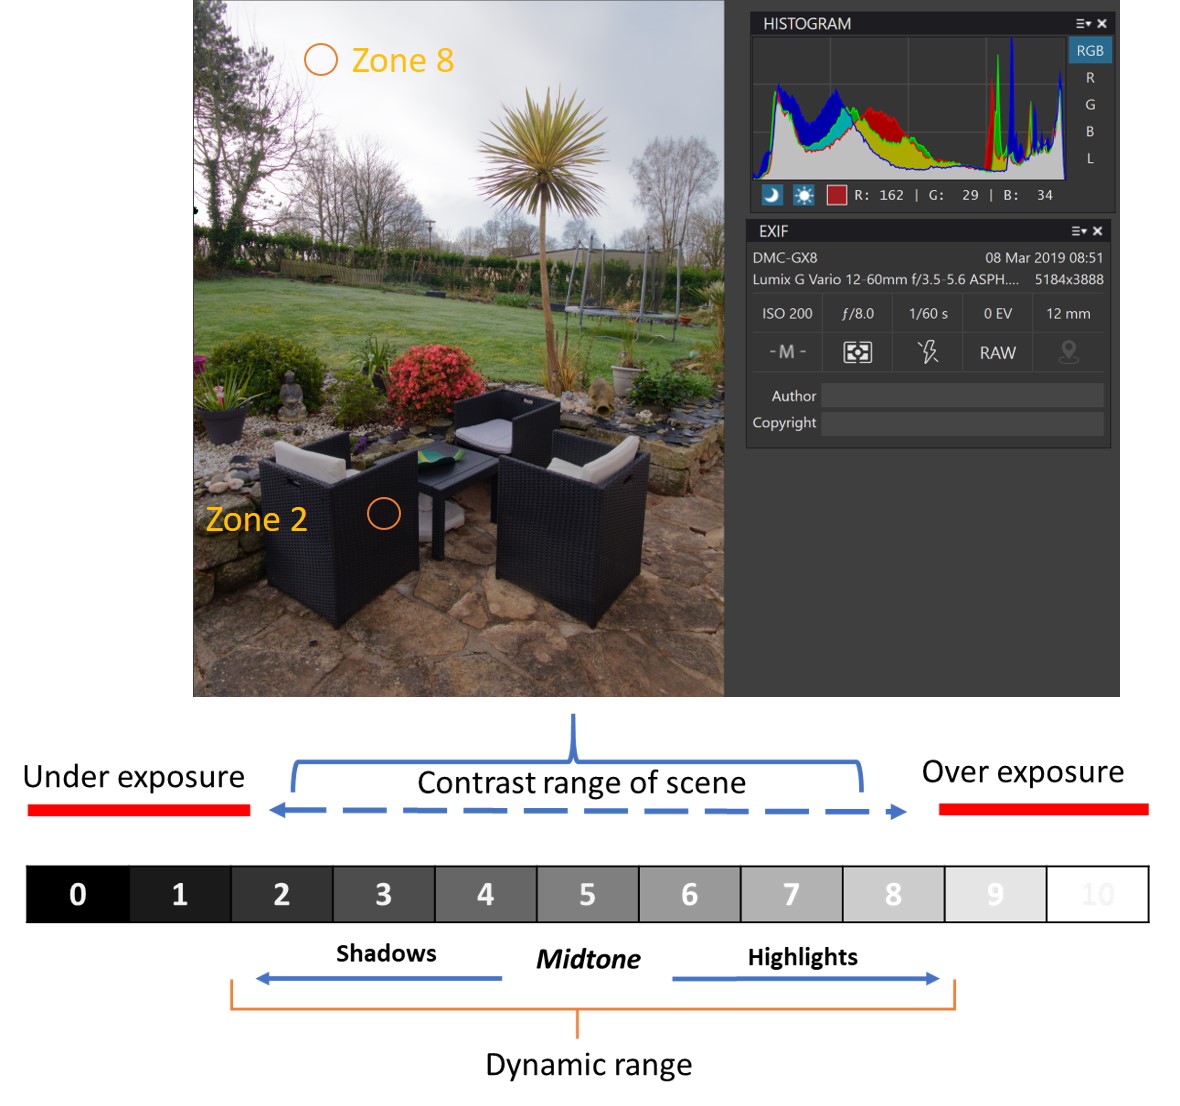
Because I was thinking in terms of tones and metering my scene to see where the important highlights and shadows fell, I was able to have full control over setting the optimum exposure.
Also, I could tell that my highlights and shadows fell within the dynamic range of my camera. Which means that all the tones between the highest highlight and deepest shadow will also be correctly exposed.

I have pinned my exposure and know with confidence that my exposure is optimised for the image. Your camera’s built in spot meter can do some of this but the best way to assess the scene in front of you and the most accurate way to set exposure is still with a hand-held lightmeter.
Of course, if the contrast range of the subject is outside of the dynamic range of your camera, then you will always lose some highlight or shadow detail or maybe both.
In summary
- Learn to assess your subject matter in terms of tones and tonal range
- Identify important highlight and shadow areas
- Measure the number of stops between the two and set your exposure accordingly
- Make more use of your camera’s spot metering capbability
- And finally, if you are serious about your photogrpahy consider geting a hand-held light meter.
I personally use a Sekonic handheld spot meter as it allows me to take multiple readings and average them out.
There is more to write on this subject but that is for another occasion. If you have any questions or need help leave a comment and I will reply.
Start the discussion